Monday, March 9, 2015

Wedding Cookies and Royal Icing Transfers

This weekend I had the great pleasure of watching my sweet sister-in-law marry the man of her dreams. She was truly the most stunning bride of all time, and I can't wait to share some pictures from the day with you soon! Coltin had the opportunity to do the ceremony and it was incredibly special for him to be such a big part of his twin sister's day.


These kinds of occasions always call for cookies and I had such fun creating these for the beautiful bridesmaids to enjoy as they did makeup and hair the morning of the ceremony.


One of the absolute best techniques I have ever stumbled upon in the cookie decorating world is royal icing transfers. It is the process of making royal icing decorations for the cookies ahead of time and then transferring them over after they've dried. Non-artists and perfectionists rejoice!! This is basically tracing over something and ending up with a gorgeous, uniform product. I've used this technique for flowers, monograms, logos, Disney characters, and several other small details like eyes! Here are a couple examples:


To get started, what you'll need is a print out of your design, parchment paper, tape, your icing of choice, a paper towel for quick clean up, and a boo boo stick.


When it comes to icing consistency, I like to use what is called "20 Second Icing." It's called that, because once you run an icing spatula through the icing, it should take 20 seconds for the icing to settle back to an even surface. This will ensure that your icing will be thin enough to make a smooth finish, but thick enough that it won't run over the edges of the design you are tracing.


Once you've got all your materials together, tape the parchment paper over the top of the design you are copying. Then trace over the design with your icing, using your boo boo stick to help smooth things out or fix mistakes. I highly recommend doing several extras! These guys can be super fragile depending on what you're doing, so you can count on a couple to break as you transfer them to the cookies. I also recommend letting your transfers dry overnight. No matter what! I've tried rushing them before and just ended up with a mess.


After the transfers have had a change to dry, use your boo boo stick or a thin spatula to help lift them off of the parchment paper.


Once it is free from the paper, fill in the area of the cookie that the transfer will attach to and give it a few minutes to slightly dry and then carefully drop the transfer on top. I have found that method works best for things like letters or other intricate designs that would be harder to "glue" on after the background color has dried. For flowers or other similar designs, you can let the cookie fully dry and then use a dot of royal icing to glue the flower on.


I ended up using these "R" transfers on the wedding cake cookies because nothing is more exciting than gaining a new initial for your monogram as a bride!


Wednesday, March 4, 2015

Chicken Salsa Verde Soup

I'm not much of a soup person. Every time I eat it, I enjoy it, but I never crave soup and it doesn't make its way onto our weekly menu very often. That being said, on a cold winter day a few weeks ago, I tried a recipe from Gimme Some Oven for chicken chili and fell in love. It is a new staple meal at our house and it's truly the easiest meal to throw together--5 ingredients, 15 minutes and you're done! I've tried both the slow cooker (when my chicken was still frozen) and stovetop (when I needed it in a pinch) versions and they are both divine. 


I've renamed the recipe for my purposes because I think the salsa verde is the star of the show. Talk about adding tons of flavor in no time at all. This soup doesn't have to simmer on the stove for hours! I grabbed the cheapest jar of salsa verde that I could find at Walmart and dumped it in. 

While the soup is heating up, chop a few add-in toppings and you've got a decadent meal to dip into. We opted for some bacon leftover from breakfast, green onions, avocado, cilantro, and a squeeze of lime. We try to keep our meals paleo as much as possible, so we opted for fresh toppings, but I imagine a dollop of sour cream and a sprinkle of cheese would take this soup over the top!


Give it a shot and let me know what you topped yours with. Fingers crossed, we only have a few more weeks of winter! 

Chicken Salsa Verde Soup
Recipe copied from gimmesomeoven.com

INGREDIENTS:

6 cups chicken broth
4 cups cooked shredded chicken (*or see slow cooker method which uses uncooked chicken breasts)
2 (15-oz) cans Great Northern beans, drained
2 cups salsa verde 
2 tsp. ground cumin

DIRECTIONS:

Stovetop Method: Add chicken broth, shredded chicken, beans, salsa and cumin to a medium saucepan, and stir to combine.  Heat over medium-high heat until boiling, then cover and reduce heat to medium-low and simmer for at least 5 minutes.

Serve warm with desired toppings.

Slow Cooker Method: Add chicken broth, 2 uncooked boneless skinless chicken breasts, beans, salsa and cumin to a slow cooker, and stir to combine.  Cook on low for 6-8 hours, or high for 3-4 hours until the chicken is cooked through and shreds easily with a fork.  Shred the chicken.

Serve warm with desired toppings.

Monday, February 23, 2015

Snow Day

Today we got a snow day! Not an "ice" day, but an actual snow day!


It was going really well until my eyes flew open at 8:00 am and I began thinking through everything I could get done with my new-found "free" hours. How many projects I could get done, blogs I could write, crafts I could make, Oscar wrap-ups I could watch...oh the options were overwhelming.

And then I sat down in my favorite chair to make a to-do list and I was mesmerized by snowflakes falling outside the window. It's near impossible to watch snow slowly drifting to the ground and not be at peace. There is something so cleansing about pure white snow covering the dead, brown grass below. It's like an eraser creating a blank slate, a fresh start.


There are seasons in life when God speaks the same thing over and over and over again. Most of the time it's because we're not listening. My theme lately has been about rest. It's been in the songs on the radio, in my discipleship lessons, in my Bible, spoken through friends and family members, and today it was if these tiny frantic footprints were shouting the same message at me all over again. Rest. Rest. Rest.


So, in spite of the anxiety rising in my chest, I decided to simply rest today and enjoy the beauty of God's creation. It hasn't been easy. My nature is to be in constant motion. My hands always need to be working, cleaning, cooking, picking up, ironing, etc. Our society has been so ingrained with the thought that if we aren't doing something, we are falling behind. And falling behind is bad. One of the books I am reading says it this way:

"We live in a society that values productivity. We often use the phrase 24/7 to describe a supposedly successful lifestyle that is full of pressure accomplishment, and perhaps, fun. There is usually little downtime. Every moment--even riding a bike on a Sunday afternoon--has to produce something. We do this to ourselves, and we expect everyone else to follow along. Soon people begin to burn out, and they are pushed aside as unproductive." 

And then the gut punch:

  "The hidden assumption in all this activity is that our time is ours to do with as we wish. The Bible challenges that assumption. When we honor God's ownership of our time, we will know better when to say yes and when to say no." 
(Spiritual Disciplines, Larry Sibley)


Ouch! I'm so guilty of that. Today I'm choosing to rest. I might even have another cup of coffee and snuggle back under my blanket for the rest of the afternoon. I hope you'll find moments this week to draw aside and take a moment to simply sit and be still. It doesn't make you lazy and even if you "fall behind" the rest of the world, I promise God will use it for your good and his purpose!

Wednesday, February 11, 2015

Valentine's Picks

Oh Valentine’s Day! There is no other holiday that elicits just as many groans as squeals of delight. Maybe it’s over-commercialized and puts too much pressure on people, but I’m a believer that the world could use a little more love all the way around. Whether you a have a special somebody or just a bunch of friends, it’s not too late to shower someone with love. I’ve pulled together a few of my favorite V-Day approved goodies to share with you! Check out the links below for some freebies and ideas to make Valentine’s Day a little extra special this year.

First of all, you need to check out my good friend over at Valerie Wieners Art. This print is the perfect way to send a special Valentine's message!

valeriewienersart.com

Chocolate covered strawberries never go out of style and they are so easy to make. Whip up a dozen with this easy recipe and share with a friend.


Looking for a less conventional way to say Happy Valentine’s day? These gorgeous FREE printables should do the trick!

sohosonnet.com
If going out is not your style, you can get a restaurant quality meal at home in no time with this Pioneer Woman recipe. It makes for a grand presentation without too much time hovering over the stove. Plus, I’ve always heard that the way to a man’s heart is through his stomach!

foodnetwork.com
 If you do decide to hit the town, make heads turn with this beautiful and natural makeup look.
nordstrom.com

Dress up your table in a pinch with this precious mason jar craft. So easy and cheap!

amandajanebrown.com


Not sure how to spoil your sweetheart for Valentines Day? Take it easy and make a homemade date night in a box. Check out these ideas and printables to dress your box and your date up.


 Last but not least, this is by far my favorite V-Day look this year. Elbow patches, sequins, and hearts all in one? That’s a triple threat if I ever saw one! Grab it here!

etsy.com
Happy Valentine's Day, friends! I hope it's sweet and full of love...and chocolate!

Sunday, February 8, 2015

Fairytales

This weekend I spent a lot of time with Cinderella. After all, she is quite demanding between her crown, carriage, ball gown, and glass slippers! After a bit of a hiatus from baking, I decided to take on this project for a little girl's birthday, and I'm so glad I said yes! By the way, you can check out the precious party girl and her decor in this adorable video by Aubrey Lisa Photography and in Kenzie's blog over at Farm Girl Blogs!


“Whenever you say yes to something, there is less of you for something else. 
Make sure your yes is worth the less.” ― Lysa TerKeurstThe Best Yes: Making 

I need to read that quote about ten times a day, every day. In years past I have been the world's worst about saying yes to anyone and everything. My reasoning was that if I said "yes" to everyone, then I was being the best friend/daughter/wife/person that I could be. Ha! In Lysa's book, she also said this, “A woman who lives with the stress of an overwhelmed schedule will often ache with the sadness of an underwhelmed soul.” Preach! 

I believe that God has uniquely gifted us with special abilities and characteristics. We all have things we love to do and that we are especially good at. My goal lately has been to say "yes" to those things as much as possible. For me, that's baking and being creative--those are the moments that my soul sings with joy.

We may not be living Cinderella's fairytale life, but we do have the choice every day to make the most of our 24 hours.  What will you say "yes" to today? 

Tuesday, January 27, 2015

Lingerie Shower Invitation Tutorial

Have I told you my sweet sister-in-law is getting married this year? Even more exciting than that, I have the honor of being her matron of honor on that special day! Let me tell you, being the matron of honor is no easy job…there’s the party planning, craft making, hours of Pinterest surfing, miniature food eating, and attending all sorts of parties and showers. Oh who am I kidding? IT’S SO MUCH FUN!!! Especially when I have a precious co-maid of honor to share all the festivities with.

One of my responsibilities was making the lingerie shower invitations. When we finally settled all the details of the party, we found ourselves in a bit of a time crunch. I needed cute invitations in a short amount of time. There are plenty of templates out there that you can purchase and print in a jiffy, but I wanted a personal touch to the ones I sent out. I gathered all the craft materials I had on hand and an idea was born.


I am sharing this quick tutorial with you today in case you ever find yourself in a pinch! It’s super simple and almost doesn't even require a tutorial, but I've included some patterns and templates to help you get started!

Materials Needed:
  • Scrapbook patterned paper
  • Cardstock in a matching solid color
  • Printable paper of your choice
  • Ribbon
  • Pencil
  • Scissors
  • Adhesive spray or glue stick
The first thing you need to do is make your two pattern corsets. I have included my own patterns here to save you some time! These fit perfectly inside a 4.75” by 6.5” envelope. If you choose to go bigger or smaller, simply click the link, save the pattern as a jpg, insert the picture in a word document and resize up or down according to your needs. I recommend printing on cardstock for a little more stability when you start tracing.

Trace the small corset on the back of the patterned scrapbook paper. You don’t want any pencil lines on the front! Pay attention to the pattern of your paper. Some patterns may require you to line up your tracing pattern a certain way, like stripes. Otherwise, trace your little heart out!


Repeat the process with the larger corset on the solid cardstock paper.

Once you have all your pieces cut out, attach the smaller corset to the larger one. I used spray adhesive because it’s quick and I knew I wouldn't have to worry about stickability (a crafting word I just made up). A glue stick would do the job just as well, but I would avoid regular Elmer’s because it tends to make thinner paper wrinkle up and dry wavy.


After you've finished gluing, you might have to do a little trimming to be sure the backing does not peek out anywhere other than the top or bottom. Don’t skip this step! It’s quick and it’s worth it to get a perfect finish.

All that’s left to do for your corsets is to tie the ribbon around the waist. I cut my ribbon pieces to 13” and tied bows. You could always buy the little scrapbook bows that stick on or use jewels instead. Make it your own with whatever you have on hand! You can even use stickers to put the lingerie sizes on the corset for an extra cute touch.


Once those are finished, set them aside and focus on the invitation part. If you’re like me and you don’t have Photoshop, an awesome resource you need to become familiar with is PicMonkey. It has some pretty great design and editing possibilities and it is completely free! You can pay a small monthly fee to use some of the upgrades, but you can get plenty of stuff using the free version.

I had patterned paper to print the invites on which saved me from having to do too much designing. I made a top and bottom border, added the wording and voila! The borders come in very useful when you get ready to cut them out. Here is a blank template of the invitation I made for your use. Click, save it as a jpeg, and insert into a word document. Add a few text boxes with your party information and print them out. You can fit two side by side on an 8.5” by 11” paper that is portrait oriented. You may have to adjust your margins a bit to fit it in.

Some information has been removed to keep the world wide web from joining our party
Print and trim the invitations using the borders as your guide, and then stuff them in envelopes with your corset on top and you’re all done!


You can do a million things to make these more detailed or more personal, so just have fun with it. Mine are moving through the mail as I type and I can't wait for them to reach the girls who will be gathering to celebrate Caitlin!


Sunday, January 25, 2015

Good Things

I mentioned in my last blog that I would be posting my progress as I work through the 2015 Goal Setting Series from Lara Casey's blog. I think there is something to be said for taking slow, purposeful steps in establishing goals and planning for the year ahead. In this case, the first step is to take a look back and remember the good things from 2014.

laracasey.com

As I think back, I am overwhelmed with the amount of change we experienced last year. This time last year Coltin and I were getting ready to celebrate our first year of marriage together. He was a part time Associate Worship Pastor and a full time teller at the local bank. I was assisting the Youth and Education Pastor and baking some on the side. We had made a home out of a small loft apartment, and we were completely unaware of how God was already beginning to move us in a new direction.

In February we celebrated a whole year of marriage together! We took a weekend trip to Austin where we relaxed, did indoor skydiving, ate out of food trucks, and strolled the streets with the locals.


In March I got to travel with our youth group back to Belize over Spring Break on mission. We teamed up with a group from North Carolina and spent the week hosting a VBS for local school children. We ended the week with a day on the island snorkeling, feasting, and debriefing with our teammates.


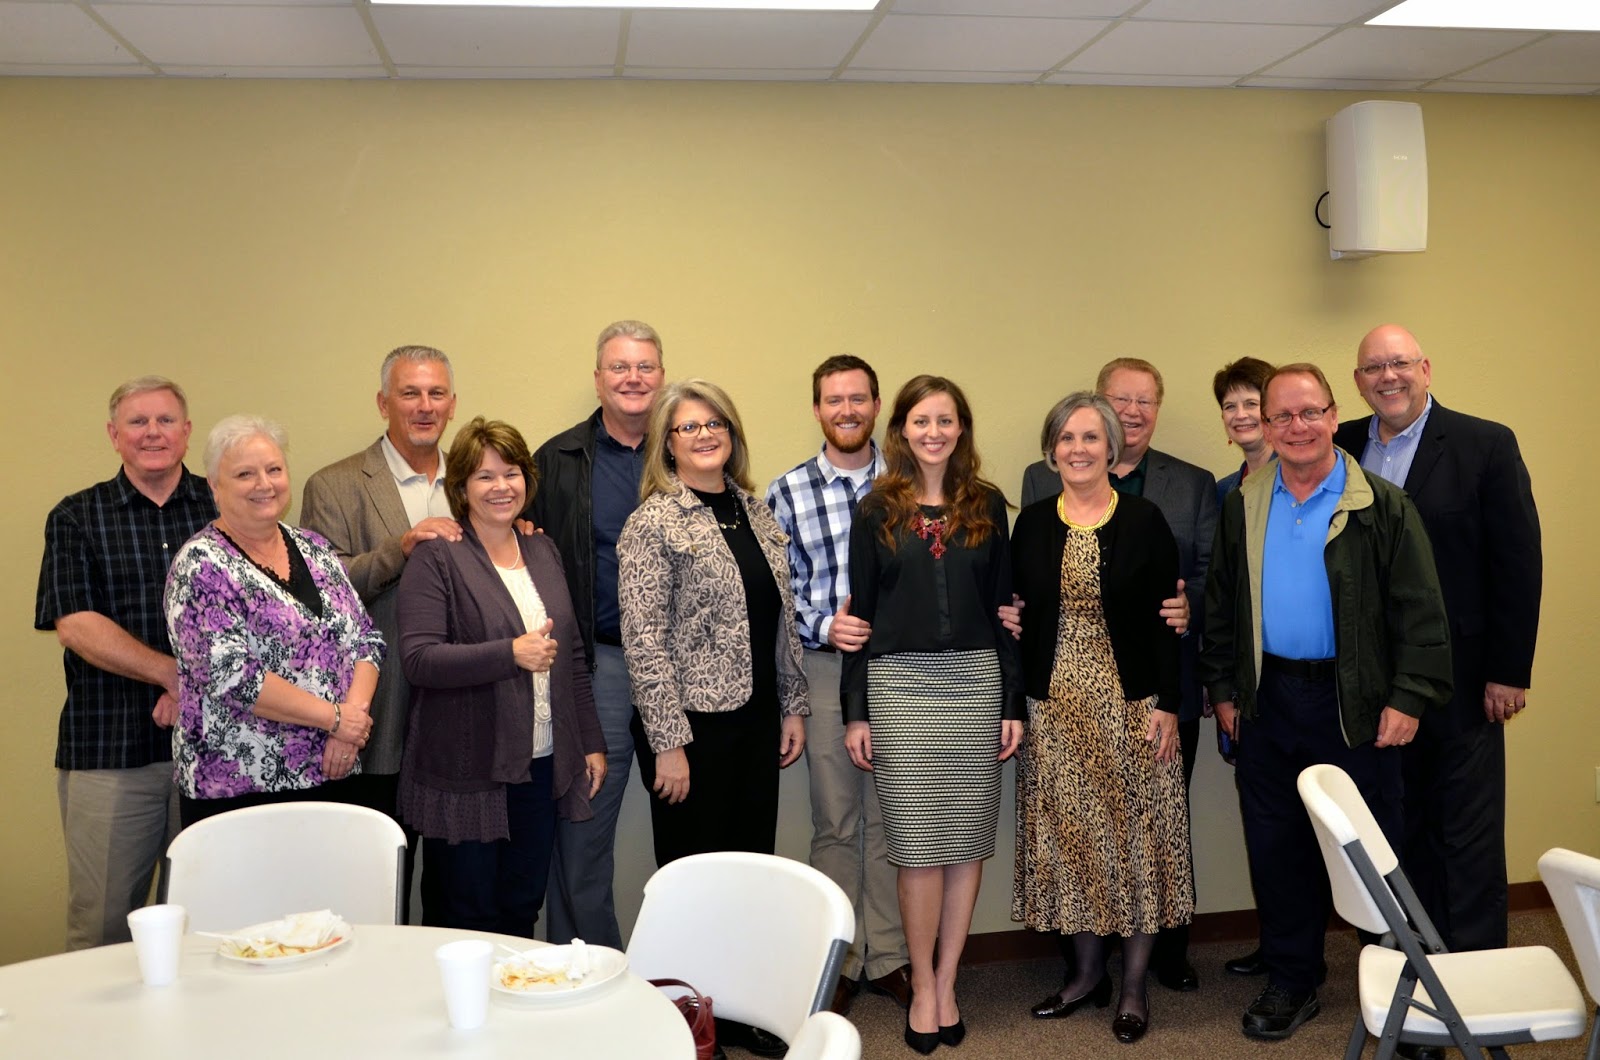
It was while I was out of the country that Coltin received a phone call that changed everything. Through nothing short of a miracle of God, we began talking to a church in Oklahoma about a Worship Pastor position they were hiring for. If I were to try to explain the path of events that had fallen into place to make this happen, you would never believe me! Long story short, in April we went in view of a call to Trinity Baptist Church in Ada, Oklahoma, and our hearts found their new home.

The beginning of one thing is inevitably the end of another, and we left our church in Justin with heavy hearts. It was the church where we met, where we first served together in ministry, where we had made many friends, and a place where we were loved more than we could ever deserve. We were taught about ministry and relationships, we were discipled, and we began our marriage with the advice and example of many spiritual parents. FBC Justin will forever hold a special place in our hearts.

On May 19 we drove to Ada with two mattresses strapped to our cars and my mom in tow. In God's faithfulness to provide, he also provided us a home through a church member. We snatched it up with a gleam in our eyes and hopes that were vested in one too many episodes of HGTV renovations.

When we hit the ground, we hit it running and never looked back! We spent 2 solid weeks of 12-16 hour days transforming the surface of the house. One day I'll dedicate a blog to the renovation in detail, but for now here are a few pictures of the transformation.


The summer was full of activities at the church and we spent every moment we could meeting and getting to know our new church family.  We even had the opportunity to spend two weeks at Falls Creek youth camp.


We decided the move to Oklahoma was a perfect chance to chase after a dream of mine, so I opened Scribbles Bakery out of our home. It was the answer to all my creative desires and it didn't hurt my sweet tooth either. 


After 5 or 6 months, the bakery was going strong, but I wasn't. I was up before dawn many days and crawling in bed around midnight and it wasn't working. It also wasn't providing the income we were hoping for, and I reluctantly shut the doors in November.  

Since then, I've begun working at East Central and it's a new experience altogether. Some days it's exciting and some days it's not. Some days it's very stressful and some days it's very rewarding. I don't know much, but I know God is using it to shape me and to make me more like him. I pray and try to remember that that's enough.

October and November were full of big family events. Coltin's sister got engaged, my brother and sister-in-law announced they are pregnant, and Coltin was ordained into the ministry!


You may relate to this, but for me 2014 ended in a holiday blur. It's my favorite time of year, and yet it always seems to fly by the fastest. It was full of warmth, laughter, and delicious smells. We spent much needed time with family and friends and it fills my heart up just to remember.


It is good to remember. I will never forget the day when I was sipping coffee with one of my dearest friends who was discipling me at the time. She brought up how often God commanded the people of Israel to remember, celebrate, write down. Remembering does us good because it helps us to see how beautifully God is working in our lives. It gives fresh perspective to things. It invites us to praise Him.

Overall, 2014 was a year of great change. It brought ups and downs as any year does, but it was full of good things. We have had community in our lives that we've never experienced before. I'm jumping ahead, but I already know one of my goals for 2015 is to invest in deep relationships. 

Friend, I hope you will take a moment to look back on 2014. It's often easy to pick out and remember the bad things that happened, the dreams that went unfulfilled, or the prayers that went unanswered. Just this once, remember only the good. Reflect on how much there was; I bet you'll be surprised!